NOQ Staff Creation enables you to create staff profiles, manage staff details and permissions, and upload multiple staff members in bulk.
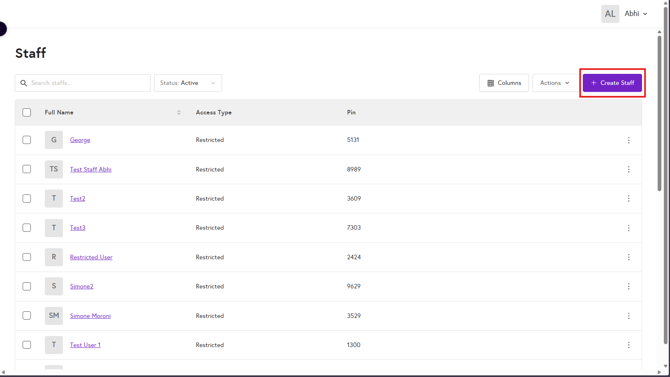
1. Access the Staff User Creation Page
- Log into the NOQ Backend Portal.
- Navigate to User Management > Staff.

- On the Staff screen Click Create Staff to begin adding a new user.
2. Complete the Create Staff Form
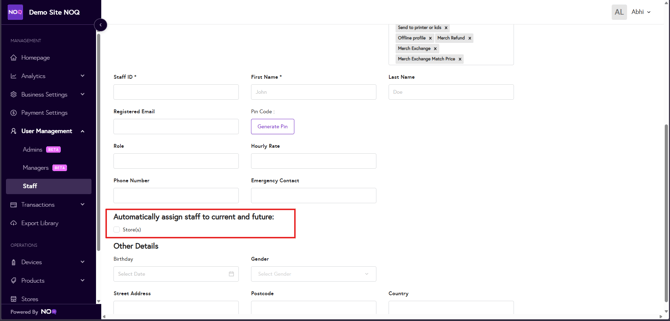
Fill in the following fields to create a staff user:
Mandatory Fields
- Staff ID: Unique identifier for each staff member, such as payroll number. This will appear in reports.
- First Name: Staff’s first name, also displayed in reports.
- PIN Code: Click Generate PIN to create a login PIN for the staff member to access EPOS applications. (You can return here to generate a new PIN if needed.)
Additional Staff Details
- Registered Email: Staff's registered email address for communications.
- Role: Assign the employee’s role.
- Phone Number: Staff's mobile contact number
- Emergency Contact: Primary contact number to be used in case of emergency.
- Hourly Rate: Enter the staff member's hourly pay rate, linked to their clock in/out records for accurate earnings calculations.
Optional Details
- Birthday: Staff's Birthdate.
- Gender: Staff's Gender.
- Street Address: Staff's full street address.
- Postcode: Staff's postcode.
- Country: Staff's Country.
- Automatically assign staff to all future stores created
3. Define Access Type and Permissions
- Set the Access Type for the staff member to customize their permissions. Permissions can include:
- Creating and editing menus
- Managing refunds
- Viewing reports
- Additional settings as needed.

4. Save and Assign Store(s)
- Click Save Staff to finalize the staff member’s profile.
- Once saved, find the new staff member under User Management > Staff.
- Click Assign Store, then use the Add Store dropdown to select the applicable store(s).
- You can assign multiple stores to a single staff member if needed.


- You can assign multiple stores to a single staff member if needed.
5. Bulk Upload Staff
If you need to create several staff at once, it may benefit to take advantage of the Bulk Upload functionality.
- On the Staff page, click on Actions > Bulk Upload.

- Click New Staff Template to download the New Staff Template CSV file.

- After opening the CSV file, remove any example data as shown in the image below .

- Mandatory Fields
- Staff ID: Unique identifier for each staff member, such as payroll number. This will appear in reports.
- First Name: Staff’s first name, also displayed in reports.
-
Additional Staff Details
- Registered Email: Staff's registered email address for communications.
- Last Name : Staff's last name.
- Role: Assign the employee’s role.
- Phone Number : Staff's mobile contact number.
- Emergency Contact : Primary contact number to be used in case of emergency.
- Hourly Rate: Enter the staff member's hourly pay rate, linked to their clock in/out records for accurate earnings calculations.
-
Optional Details
- Birthday : Staff's Birthdate.
- Gender : Gender of the staff.
- Street Address : Staff's full street address.
- Postcode : Staff's postcode.
- Country : Staff's Country.
- Automatically assign staff to all future stores created : Which is No by default.
- By default, all permissions are set to No. To grant any permission to a staff member, change the relevant field to Yes.
- You can add as many staff records to the template as needed.
- Mandatory Fields
- When you’re finished, save the file in CSV format.
- On the Select Action drop down on the Bulk Uploads page, select Add new staff. Click Upload Template and upload the file from your computer. After the upload, you’ll see a success message and the Status column will show Completed. If there are any errors in your CSV (for example, missing mandatory fields or invalid values), the upload will fail and an error file will be downloaded. Open this error CSV to review which records and fields need correcting, then update your file and re-upload.

- If you need to bulk edit your staff list, you can download the Current List Template, made your edits then use Select Action > Edit current staff and upload the edited file.
Your new staff member is now set up with the appropriate access and assigned to their designated store(s).