Table-specific QR codes allow customers to place orders without entering their table number.
When a customer scans the QR code assigned to a table, the system automatically identifies the table, allowing vendors to know exactly where the order should be delivered.
Step 1: Log in to the NOQ Portal
-
Log in to the NOQ Backend Portal using your credentials.
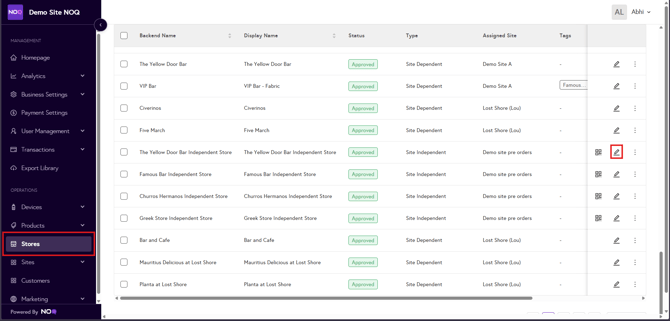
Step 2: Open Store Settings
-
From the sidebar, click Stores.
-
Locate the Site Independent or Independent store you want to configure.
-
Click the pencil (edit) icon for that store.
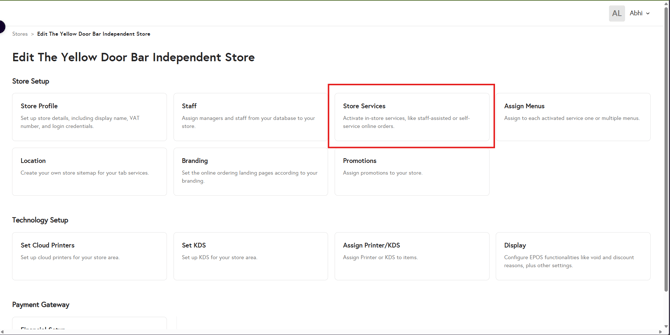
Step 3: Access Store Services
-
Click Store Services.
-
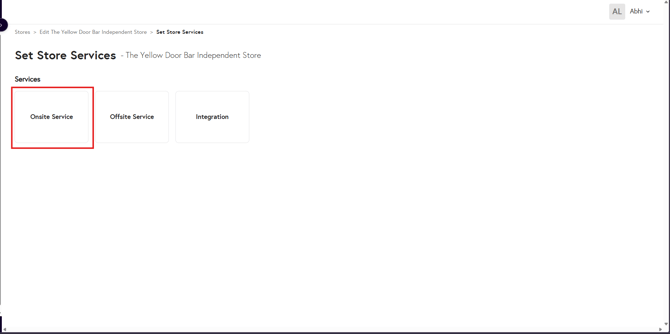
Select Onsite Services.
-
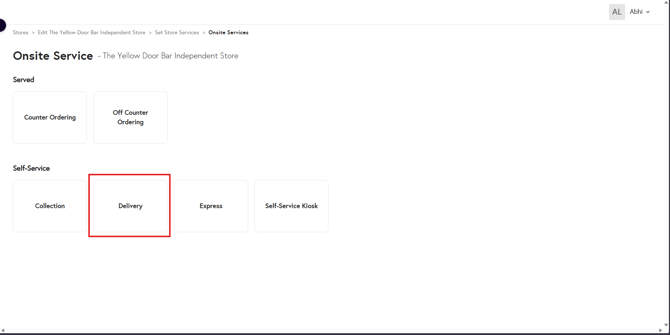
Click Delivery.
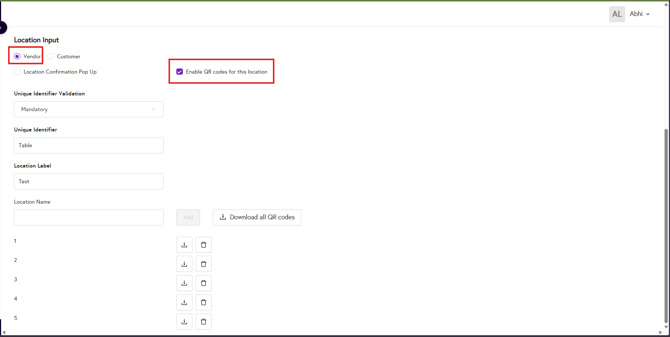
Step 4: Enable Table QR Codes
-
Scroll down to the configuration section.
-
Ensure Vendor is selected.
-
Enable the option Enable QR code for this location. If you are enabling the QR code for this location for the first time, make sure you save your settings so the QR code can be generated.
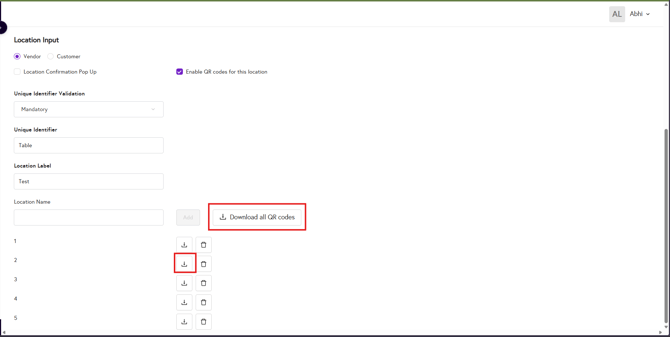
Step 5: Download Table QR Codes
-
Click Download all QR codes.
A ZIP file will be downloaded containing QR codes for all tables configured for that store.
Step 6: Use the QR Codes
-
Extract (unarchive) the downloaded ZIP file.
-
Print and place the QR codes at the corresponding tables.
Customers can then scan the QR code to order, and the system will automatically assign the correct table to the order.